This guide will reveal everything about cleaning and maintaining a bathroom mirror. You'll discover how to keep everything spotless but also remove persistent stains. It'll also explain how to fight fog and apply minimal maintenance effort for maximum results. Here is what you should know about keeping your vanity fixture in perfect condition!
How Do You Clean Bathroom Mirrors?

Regular cleaning is imperative to keeping your fixtures clean in any room. The term “regular” might refer to twice per month, once weekly, or as necessary. The idea is to deal with dirt while it’s minimal or non-existent. Thanks to that, you won’t have many persistent stains, which require more effort to clean.
The project of cleaning a toilet mirror shouldn’t take more than 15-20 minutes. That doesn’t include the time required to gather supplies. You’ll find a detailed explanation of the entire process in the following sections.
Preparing Yourself for the Task
Before you start cleaning, it's important to prepare the necessary equipment. It's crucial to acquire proper supplies. Some products aren't suitable for small bathroom mirrors; others might damage glass surfaces. That's why finding the right solution is imperative.
Check out the things needed for the project:
1. Microfiber Cloths
The experts recommend using cloths only for this purpose. That means you shouldn’t wipe other surfaces with it. Instead, only use it on glass and only for mirrors in your bathroom. Another thing to note is that you should get a “flat-weave” cloth. It’s because you don’t want to leave any marks during the cleaning process.
2. Rubbing Alcohol
Most households already have this in their inventory. If not, it should be easy and cheap to buy. A single pack lasts for a while, so it’s an affordable investment.
3. Glass Cleaning Solution
This is a crucial asset because you need a high-quality unit. You can purchase a glass cleaner in the local store. The alternative is to make your own cleaning solution. Some stains require just that, and you can find more about these mixtures in the sections below.
4. Cotton Balls
These are convenient accessories when cleaning any mirror. They offer a simple way of removing persistent debris and make-up stains. Additionally, these pads are affordable and versatile.
It’s Cleaning Time!

Make sure to double-check if you prepared all items required. Once you have them ready, it’ll only take several minutes to clean your vanity mirror. The simple steps below will guide you through the process.
Step 1: Begin with Spot Cleaning
The initial task is to analyse the mirror well. You’re looking for any spots and stains from make-up, toothpaste, or water splashes. Grab a cotton pad and dip it into the rubbing alcohol. Next, use it to gently wipe the stain. It’ll help the actual process go smoothly.
Step 2: Apply the Cleaning Solution
Do you have your glass cleaner ready? It’s better if it has a spraying option as you can apply it easily to the mirror. If you use a homemade product, pour it into an empty bottle with a sprayer. These solutions are usually strong. It implies you won’t require a generous quantity of this substance. It’s sufficient to cover all sections.
Step 3: Wipe the Cleaner with the Cloth
Experienced cleaners use a neat trick of folding the microfiber cloth. If you fold it in advance, you get multiple cleaning surfaces to use. It’s important not to overuse a single section.
If the cloth gets dirty, you can replace it with another one. That could happen with large vanity mirrors. A single cleaning unit might not be enough for the entire surface. You can wash it or simply use another if available.
Newbies could use some pointers on how to use microfiber cloths. It will ensure maximal results from each move. These suggestions can be of assistance:
The idea is to know where you began and come up with a cleaning plan. Right-handed people usually start with the upper-left corner, but there's no exact rule.
Apply light pressure and pull the cloth from one corner to the opposite. Next, use zigzag moves toward the bottom. It’ll cover the entire mirror and ensure optimal results.
You should use S-shaped moves for the final touches. That ensures covering the sections you might have missed previously. Make sure to maintain light pressure since you don't want to risk breaking the glass.
Step 4: Allow the Mirror to Dry
You want to let the cleaning solution dry for a bit. It shouldn’t take long. Once that happens, perform a close inspection. Analyse the mirror from various angles looking for potential stains or spots remaining.
If you notice an imperfection, spray some of the glass cleaning solutions on it. Use a cloth to wipe it clean. Alternatively, you can use cotton pads and rubbing alcohol again.
Are There Alternatives to Store-Bought Glass Cleaners?

Glass cleaning solutions are versatile and usually perform well. However, you might be facing a stain that resisted the product you were using. It doesn't matter if you need an alternative or prefer a homemade cleaner. Here are the substances you should try!
1. White Vinegar
This is the most common homemade solution used worldwide. It only takes grabbing a bottle and mixing white vinegar and water into it. The standard ratio is 1:2. However, if you want a stronger substance, use 1:1.
You’ll need a clean cloth to wipe the glass surface with this solution. Make sure to cover the entire area and wait for it to dry.
2. Chlorine Solution
The next option is to mix water and chlorine powder. Once you combine it, apply it to the glass surface. Allow it to dry for about 40 minutes. Use a dry cloth and warm water to wipe the substance from the mirror.
3. Lemon Juice
The secret of using lemon for cleaning is its elevated acid quantity. It helps with grease and can loosen persistent stains. Use cotton balls dipped in lemon juice and apply them to the surface thoroughly. The final step is using a dry cloth and water to wipe the glass surface clean.
4. Toothpaste
While it can leave stains, you can also use toothpaste to remove them. The initial step is using fabric to apply it to the glass surface.
Let it rest for 20 minutes until you see the toothpaste is dry. Now, grab a clean damp cloth and wipe everything well.
5. Liquid Bleach
You'll need two clothes for the project. Get some bleach on the first and apply it to the glass. Next, grab the second and wipe the mirror. There's no need for any water, which contributes to simplicity.
How to Remove Water Stains on Mirrors?

Once you splash the mirror, you know it’s already too late. The stains will develop soon, especially if your municipality water is of poor quality. Fortunately, there’s a solution for removing these marks. Make sure to check it below!
Begin by Making a Homemade Solution
You can buy a glass cleaner, but a water-vinegar solution works well. Mix it in a 1:1 ratio. If it's possible, make sure it's water that doesn't have a lot of minerals. A smart idea might be to filter it if you have suitable equipment.
Apply the Substance to the Mirror
The experts suggest using a towel. It's imperative that you dip it into the solution. Keep the section of the product used wet while wiping. Focus on the watermarks and use gentle force.
Be Persistent If Necessary
Some stains might take a longer application of the solution. Keep the towel on those spots for 30-60 seconds. You can even repeat this multiple times. If it doesn't work, move to a strong and professional cleaner.
How to Stop Bathroom Mirrors from Fogging?

You purchased a mirror for bathroom spaces and love how it looks. Unfortunately, there are obvious fogging issues while you are showering. Some areas are prone to fogging, but how to ensure the glass surfaces remain resistant? Here are some tips that could help!
Get an Anti-Fog Mirror
A smart move can be to purchase an anti-fog mirror, such as one from the range offered by Remer Mirrors. These units have fog resistance better than standard vanity features. Here are some range specifics that make them worth considering
The modern mirrors feature modern aesthetics that perfectly fit contemporary decors. Owners appreciate the designers’ creativity. Thanks to it, these fixtures can become the focal point of the entire area.
The products comes in various sizes that are optimal dimensions for versatile uses, including brushing teeth, shaving, etc. The dimensions offered also ensures the fixtures fit well in both small and large bathrooms.
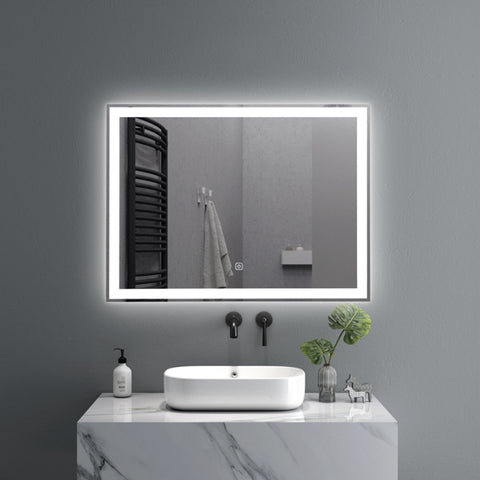
Remer backlit mirrors come equipped with LED lights. Activation is simple as it only requires using a touch power switch. It’s convenient when you need some extra lighting. Additionally, it can improve the overall bathroom’s aesthetics to anyone who enters.
Other Tips for Fighting Mirror Fogging
Do you need additional guidance to deal with fog on glass surfaces in your bathroom? You can create an environment that discourages fogging. Check out the tips to apply below!
The Secret of Cold Water
Did you notice that temperature increases and hot water contribute to fog? The vapour from the shower gets to the mirror and makes it foggy.
You can counteract that by switching the shower to cold for about a minute first. That will increase the time necessary for the fogging to appear. However, this doesn’t help with long showering sessions, especially in small areas.
Improve Ventilation
Do you have a window that you could open? Is it an option not to close the bathroom door? This could help to enhance the ventilation, which reduces fogging risk. However, be careful if it’s cold outside. It’s not worth the risk of getting ill.
Use Soap or Shampoo
Are you ready to hit the shower? Before doing that, apply some soap to the mirror. Make sure to avoid too much force if using a bar. You can also use shampoo applied by a paper towel or even shaving cream. However, this requires cleaning it after showering, which can be a hassle.
Put Something on the Mirror
Another convenient tip is to cover the glass surface you want to keep fog-free. For a mirror, that could be a towel. If necessary, use thumbtacks or putty to hold it in position. It will ensure the vapour doesn't get to the actual fixture.
Vanity Mirror Maintenance – Mistakes to Avoid

Things you do are equally important as those you avoid while maintaining your fixtures. Mistakes that worsen the situation shouldn’t happen. Check out the steps you should steer clear from when cleaning the mirror!
Don’t Use a Wet Cloth for Dirt
If you notice debris or other particles, don’t use a wet cloth. The odds are you’ll spread it and make the surface blur. Instead, use a soft and dry cloth.
Never Leave the Lights on While Cleaning
If your mirror has LED lighting, turn it off before doing anything. You want to turn off the power supply to avoid any potential problems. It's a crucial safety tip for fixture maintenance.
Don’t Leave Cosmetic Stains
It’s better to clean all the marks as soon as possible. However, cosmetic stains might be particularly harmful. It’s because they could damage or discolour the surface.
Never Use Alkali or Acidic Cleaners
Although it might be suitable for glass, the problem is with the frame. These substances could damage the edges or the mirror’s backing. Additionally, you shouldn’t use ammonia-based solutions either.
Don’t Go with Cloths That Can Scratch the Surface
It’s imperative to stick to grit-free fabrics. That’s because any bump is an increased scratching risk. And once you scratch a glass surface, there’s no going back.
Never Use Old Newspapers
It might be your grandma’s way of cleaning the mirror. The problem is that newspapers have debris and can even leave ink stains. That’s particularly true for today’s paper production. That’s why it might be useless to clean this way.
Final Thoughts
Maintaining a clean bathroom mirror shouldn’t necessarily be a hassle. A minimum effort on a regular basis can secure optimal results. Thanks to this guide, you also know which steps to take in the cleaning and maintenance process.


